Replacement Main Rotor for Mini Infrared Remote Control Electric Helicopter
Product Description
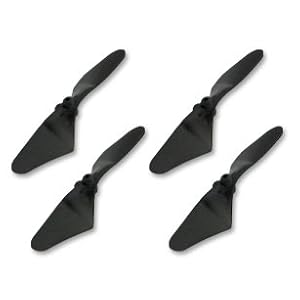
This is a replacement principal drive rotor blade for the Mini Heli Infrared Indoor Helicopter, Bell Heli IR Indoor RC Helicopter, Picco Z, Havoc Heli and clones. It is a great thought to preserve a spare rotor on hand to let you preserve flying in case yours is damaged in a crash. If you shed the little silver weights in the leading stabilizer you'll require to obtain a new rotor blade. Primary Rotor Blade Specifications: Rotor Diameter: five.2" (13.2cm) Material: Flexible black plastic Attributes: Integrated stabilizer (leading hinged portion) This Main Rotor Blade Is Compatible With: Mini IR Helis Mini Bell IR Heli, Spin Master Air Hogs Havoc Helis, Silverlit Picco Z, Clones like PiccoZ, PicooZ, etc...

Product Details
- Product Dimensions: 6 x 3.9 x 1 inches ; 0.2 ounces
- Shipping Weight: 0.2 ounces (View shipping rates and policies)
- ASIN: B000PVYHPS
- Item model number: GEN-001A
- Manufacturer recommended age: 13 years and up
- Amazon Best Sellers Rank: 27,677 in Toys ; Games (See Top 100 in Toys ; Games)
By : Mini IR Helis
List Price :
Price : $5.99
You Save : $2.00 (25%)

Product Characteristics
- A single primary helicopter rotor blades - Black
- Fits air hogs havoc heli, havoc stinger, venom micro ranger, picooz, and brandmates
- Maintain you preferred micro helis flying just after a negative crash
Consumer Reviews
I have been quite pleased with this replacement rotor for my mini-helicopter (I assume it really is a Havoc but the box does not say)! I received and installed the new rotor and my heli flies just as well as it did just before and the new rotor does seem to take significantly a lot more abuse with out falling apart like the original 1 did.
Contrary to some opinions, I found that the new rotor is simple to replace utilizing two medium length needle nose pliers.
1. With out HOLDING THE Body OF THE HELICOPTER, grip the metal shaft that is visible amongst the physique and black plastic of the presently installed rotor with one pair of pliers
NOTE: If you attempt and hold just the foam body of the helicopter you risk damaging the gears, physique, and rotor shaft.
two. With out TOUCHING THE HELICOPTER Body and when continuing to grip the metal rotor shaft (grip tightly, if the pliers slip they can damage the body), use the other pair of pliers to grip the plastic shaft attached to the rotor blades and gently slide up and off the metal shaft.
three. Although continuing to grip the metal rotor shaft with the 1st pair of pliers, insert the metal shaft into the plastic hole of the new rotor.
four. Meticulously but firmly press the new rotor into place taking care not to bend or stress the metal shaft.
Voila, you really should be ready to rock and roll! The total replacement method took me about 45 seconds.
Installation was straightforward but it does not offer adequate lift to get helicopter off the ground. It just sits there and spins.
Related Product

Post a Comment